A worn table top usually tells the truth about how a home is used. Hot plates leave pale rings, kids’ projects leave scratches, and years of wiping can wear a finish thin around the edges. If you’re looking up how to refinish wood table top surfaces, you’re probably trying to save a solid piece that still has good bones. That is almost always worth doing – if you approach it with the right prep and realistic expectations.
Refinishing a wood table top is not complicated in theory. You remove the old finish, smooth the surface, correct any damage you can, then build the protection back up. Where people get into trouble is rushing. Most bad refinishing jobs come from skipping surface prep, sanding unevenly, or choosing a finish that does not match how the table is actually used.
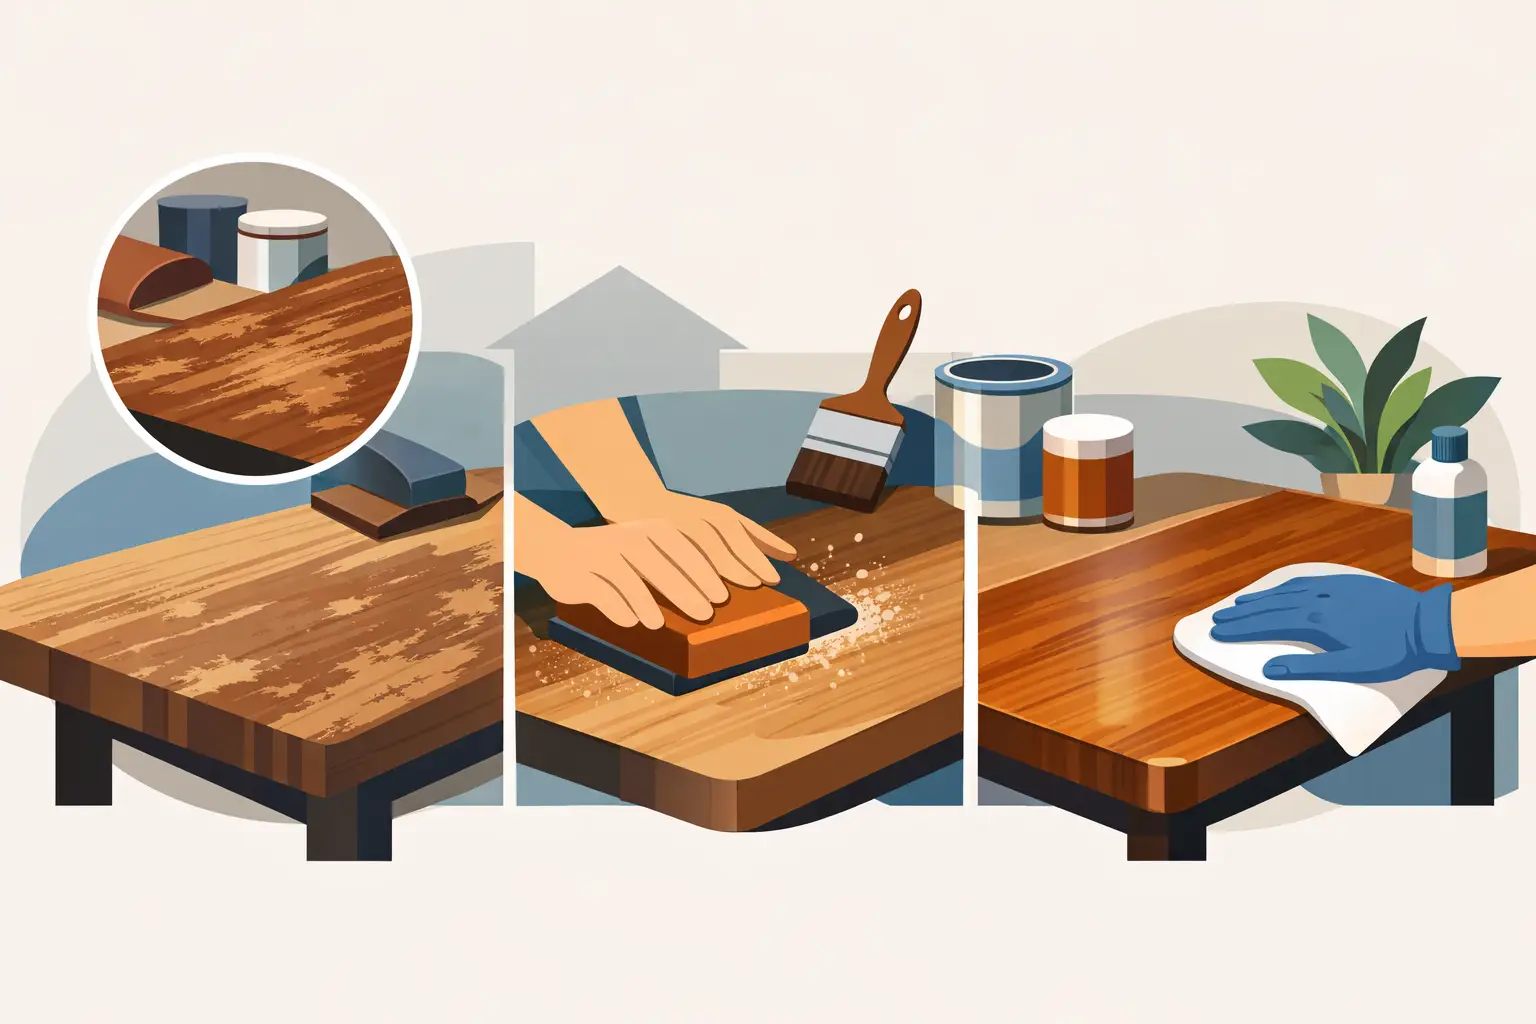
Before you refinish a wood table top
First, make sure the top is solid wood or at least has enough real wood veneer to tolerate sanding. If the table top is laminate, refinishing in the traditional sense is off the table. If it is veneer, you need a lighter touch because aggressive sanding can cut through quickly and expose the substrate underneath.
Take a close look at the damage. Water rings, shallow scratches, faded finish, and minor stains are common refinishing problems. Deep gouges, warped boards, separated glue joints, or black water staining that runs deep into the fibers may require repair work beyond a basic refinish. A table that rocks, splits, or has loose joinery should be fixed before you worry about color and sheen.
It also helps to identify the existing finish. Old polyurethane, lacquer, shellac, hardwax oil, and paint all behave differently. If you’re not sure, that’s normal. In most home refinishing projects, full removal by sanding or stripping gets you to clean wood either way.
Tools and materials that make the job easier
You do not need a full cabinet shop to get a good result, but you do need the basics. Most homeowners can handle the job with a random orbital sander, sanding discs in several grits, clean rags, a vacuum, tack cloth or microfiber, wood filler if needed, stain if you want color, and a durable topcoat.
For topcoats, the best choice depends on use. A dining table or kitchen table needs more protection than a decorative side table. Wipe-on polyurethane is forgiving for beginners but takes more coats. Brush-on polyurethane builds faster and gives strong protection, but it shows drips and brush marks if applied too heavily. Hardwax oil gives a natural look and easy repairability, but it generally needs more maintenance over time. If this table sees daily meals, spills, and heat, a tougher film finish is usually the practical call.
How to refinish wood table top surfaces step by step
Start by removing hardware, if there is any, and setting the top in a clean, well-ventilated workspace. Protect the base if it is staying attached, or better yet, separate the top so you can work flat and comfortably.
If the existing finish is thick, flaky, or gummy, a chemical stripper can save time. If the finish is thin and reasonably stable, sanding alone often works. Either approach is fine. The goal is not to prove toughness. The goal is to get back to sound, clean wood with the least damage to the surface.
When sanding, begin with a grit coarse enough to cut the old finish but not so coarse that it leaves deep scratches you will fight later. For many table tops, 80 or 100 grit is a good starting point. Sand evenly across the whole top. Do not camp out in one spot, especially on edges and corners, because those areas disappear faster than the center.
Once the old finish is gone, move up through finer grits. A common progression is 120, then 150, then 180. If you’re staining, stopping around 150 or 180 usually gives good stain absorption. Going too fine can reduce how evenly the wood takes color. If you’re not staining and just applying a clear finish, you can sand a little finer depending on the species and the look you want.
After each sanding step, vacuum thoroughly and wipe away dust. Leftover dust is one of the easiest ways to ruin an otherwise careful job.
Handling scratches, dents, and color issues
Not every mark needs to disappear completely. Some wear belongs on an old table. That said, you should deal with anything that will stand out badly under finish.
Shallow scratches often vanish during sanding. Small dents can sometimes be lifted by placing a damp cloth over the area and applying heat with an iron for a few seconds at a time. The moisture turns to steam and can swell compressed fibers upward. This works on dents better than cuts. If fibers are torn, filler may be the better option.
Use wood filler sparingly and only where necessary. On a stained top, filler can look different from surrounding wood because it absorbs color differently. If the table is made from species with strong grain variation, that contrast becomes more obvious. For high-visibility tops, many woodworkers prefer to live with minor imperfections instead of creating obvious filler patches.
If the top has uneven color from old sun fading or past water damage, you may need more sanding than expected. Some stains go deeper than the finish itself. The trade-off is simple: the more you chase a perfect color reset, the more material you remove. On solid wood, you have more room. On veneer, you may need to accept some history.
Stain or no stain?
This is where style and practicality meet. A clear finish over natural wood shows the species honestly and avoids blotchy color problems. If the wood already has a tone you like, clear is often the cleanest path.
Stain makes sense when you want to deepen color, match other furniture, or even out a top that looks pale after sanding. Test it first on the underside or a hidden area. Different woods take stain very differently. Pine can blotch. Maple can look uneven. Oak tends to accept stain more predictably.
If you use stain, let it dry fully before topcoating. Rushing this step can trap solvents and create adhesion problems or soft finish that stays tacky too long.
Choosing the right finish for a real home
A table top is not a picture frame. It gets touched, wiped, leaned on, and used hard. That means your finish matters as much as your sanding.
For most families, polyurethane is still the workhorse. Oil-based polyurethane adds warmth and builds a durable protective layer, but it ambers over time and dries slower. Water-based polyurethane dries faster, stays clearer, and has lower odor, but it can raise the grain and sometimes looks a little cooler in tone. Neither is universally better. It depends on the wood, the color you’re after, and how patient you can be between coats.
Apply thin coats, not heavy ones. Thin coats level better and cure more reliably. Sand lightly between coats with a fine grit or abrasive pad once the finish is dry enough. Then remove dust and apply the next coat. Most table tops benefit from at least three protective coats, and often more if you’re using a wipe-on product.
Be especially careful with the edges. They are easy to under-finish and easy to wear out first. A good-looking top with weak edge protection will not stay that way for long.
Common mistakes that ruin a refinish
The biggest one is uneven sanding. Swirl marks, shiny leftover finish patches, and edge dips usually come from inconsistent pressure or skipping grits. Another common problem is applying stain or finish over dust. It sounds minor until you see rough grit locked into a fresh coat.
Humidity and temperature can also work against you. Finishes do not cure the same way in a damp garage as they do in a climate-controlled shop. If conditions are poor, dry times stretch and surface defects become more likely.
The last mistake is using the table too soon. Dry to the touch is not the same as fully cured. A finish can feel ready and still be vulnerable to scratches, heat marks, or stuck placemats. Give it the cure time the product calls for, and if you can wait a little longer, do it.
When a professional refinish makes more sense
If the top is a valuable hardwood slab, has veneer you don’t want to risk sanding through, or needs structural repair along with finishing, hiring it out can be the smarter choice. The same goes for large custom tops where a bad result costs more than the service would have.
At Tooill Cabinets, we work with wood surfaces every day, and the difference between a quick cosmetic fix and a finish built for years of use is usually in the prep and product choice. Good craftsmanship shows up in the parts most people never notice right away – flat sanding, clean edges, and a finish that holds up after the first month.
A well-refinished table top should still look like wood, not plastic and not overworked. If you take your time, respect the material, and choose a finish that fits the way your home actually lives, you’ll end up with something better than just cleaned up. You’ll have a piece ready for another long stretch of real use.